
Experiments with Natural Dyes
/This will, I’m sure, be just one of many posts about natural dyeing. It’s something I always come back to in the fall and winter, when I have more time indoors and get itchy for little creative projects.
I first started experimenting with natural dyes in 2018, after seeing some glorious silk ribbons that Arielle of Small Yard Flowers had dyed with onion skins and other plants. The silks were ephemeral, rich with color, sumptuous, earthy. I had to try it for myself!
A Simple Start
My first experiment was with avocado skins and pits, a great place to start for a beginner. I found a tutorial by Rebecca Desnos (probably this one), and off I went.
The fabrics I had on hand were a linen handkerchief, a cotton pillowcase and a scrap of lace fabric, possibly a cotton blend – so that’s what I used. I didn’t have a dedicated dye pot, so I used a stainless pot on the kitchen stove. I didn’t use any kind of mordant, and I didn’t pretreat the fabric. I just started with cleaned avocado skins and pits, covered them with water, and boiled and then simmered until the water turned dark. I added the fabrics and let them soak…for a while?
I can’t find any photos or notes from that first experiment, so I’m just going off memory. I did, however, use part of the lace fabric on a wedding bouquet later that summer because it matched the color palette perfectly, and my client loved the special touch. And I used another bit of it on a wedding bouquet last summer, and the color was still vibrant after four years!
Hooked on Colors
After that first avocado dyeing experiment, I was hooked. As time allowed, I started testing other plant materials. I quickly found a place to order silk fabrics that I could dye and tear into ribbons of any size. Dharma Trading Co. is still my go-to for silk fabrics of all weights and sheens. My personal favorite is crepe de chine, which is thicker and has more of a matte texture. It’s beautiful for silk scarves or ribbons.

A rainbow of color
In fall 2018 I dyed my first big batch of silk ribbons using marigolds, ‘Karma Chocolate’ dahlias, onion skins, avocado skins and pits, red beets and elderberries.
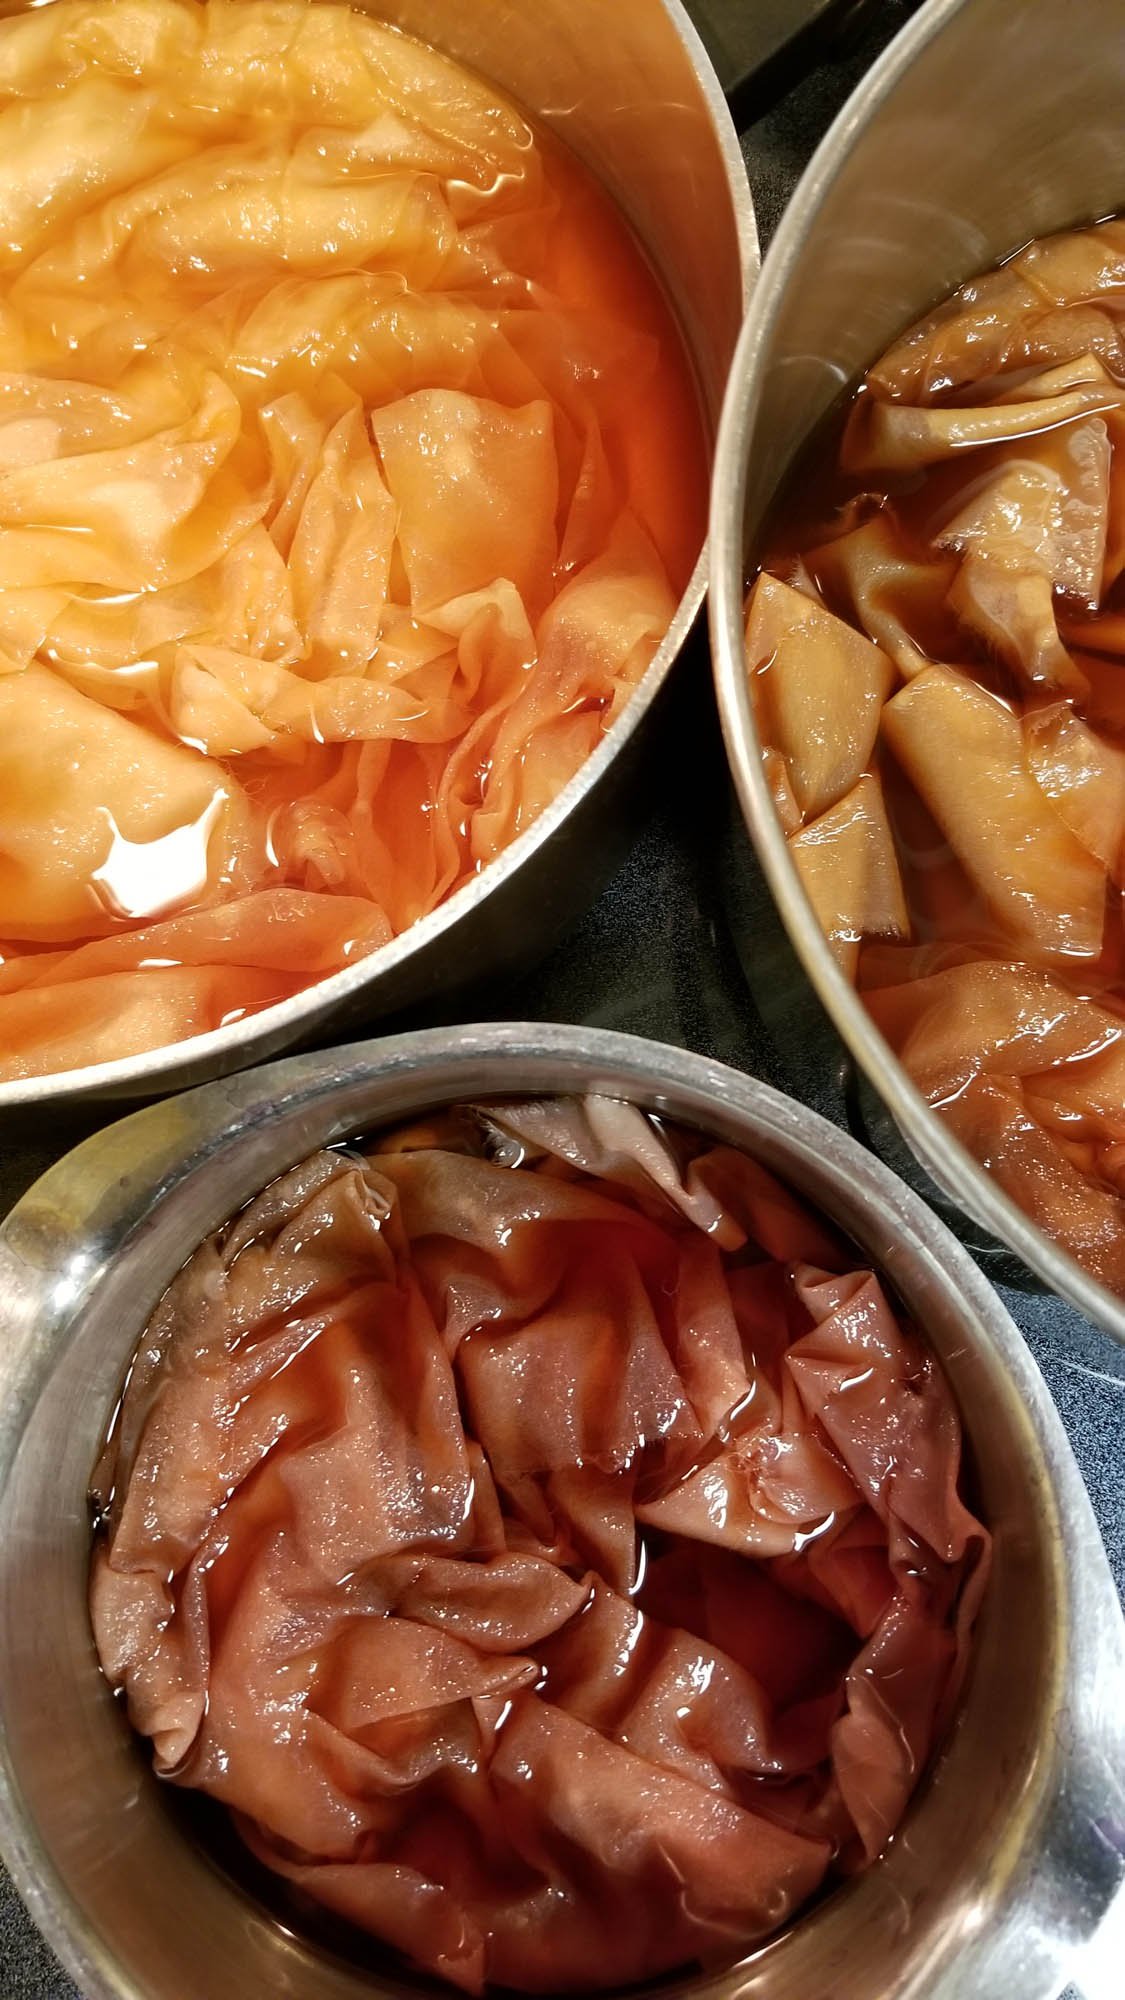
My Dyeing Process
Over the years I’ve tried dyeing with LOTS of different plants, flowers, herbs, vegetables, spices, nuts, fruit skins…anything I was growing or could find in the kitchen. While the dye materials have varied widely, I’ve usually stuck to a very simple method, primarily using silk as my medium.
Here’s what I typically do:
Put the plant materials in my aluminum stock pot. I’ve read about using alum as a mordant, to help “fix” the color into the fabric, but since I don’t use mordants I’ve found that the aluminum pot seems to help. Because I mostly make ribbons, not clothing, I’m OK with the color fading over time. The ribbons can be gently hand washed if needed.
Cover with water. I’m not scientific about this. Usually I add as much water as I think I’ll need to soak the amount of fabric I’ll be dyeing. (There’s a term called “weight of fiber,” or WOF, meaning that there is usually an optimal ratio of dye materials to fabric/fiber. But I don’t usually pay attention to that. I prefer to go by feel, make a guess, and see what happens.)
Heat to boiling, then simmer for some amount of time – usually 20 to 40 minutes.
Scoop or strain out the plant materials, then return the dye liquid to the pot and add the fabric. This is what’s called a dye bath. If I’m making silk ribbons, I always dye a wider strip (six inches or more) and then tear later. It saves a lot of tangles and frustration.
Return the pot to the stove and simmer a while longer – usually 20 to 30 minutes.
This is where it gets fun! Some colors will soak into the fabric immediately, while others take time or are more subtle. Gently stirring the fabric and checking the dye strength is my favorite part.
Leave the fabric to soak. I’ve experimented widely, sometimes leaving the silk in for an hour or less, and sometimes letting it soak overnight or even longer. As it soaks longer, I’ve had the liquid get funky, turn color or lose its color. I’ve had amazing results and some definite duds. But I like the surprise! I try to take notes, especially when I get great results unexpectedly.
Remove the fabric from the liquid, squeezing out any excess. Run under cool water to remove any stray dye. With silk I like to squeeze out the excess water, then briefly roll in a towel to start the drying process. Then I’ll hang the silk on a plastic hanger to finish drying.


Other Dyeing Methods
In addition to the standard method described above (also called a dye bath), I’ve tried a few others.
Bundle dyeing. This involves placing the plant materials directly on a piece of fabric or silk, rolling and tying the bundle, and steaming it to release the dyes into the fabric. The bundle is allowed to cool overnight, then unrolled to reveal the pattern and remove the soggy plant bits. Results are often surprising, especially when using overlapping materials and several different dye ingredients.
Solar dyeing. Maybe the easiest of all methods, and potentially funky. Basically you put your plant materials and fabric together in a large jar, fill with water, cover with a coffee filter, and leave it in the sun until the colors develop. I’ve had the best results by leaving the jars in my high tunnel in the middle of summer, where it’s consistently sunny and warm. Depending on how long you leave the jars, the funk that develops may be difficult to rinse out of the fabric. But the colors! Worth it.
Adjusting the pH. Not really a dyeing method, this involves lowering or raising the pH, or acidity level, and therefore shifting the colors produced by the dye bath. White vinegar or lemon juice will increase acidity and lower the pH, while baking soda increases alkalinity and raises the pH. As long as you don’t add both at once (hello grade-school volcano), it feels like a fun, low-risk science experiment.

Silk scarves dyed with catalpa pods (left), avocado skins and pits (center), and coffee and onion skins (right)
An Incomplete List of Dye Ingredients I’ve Tried
Avocado skins and pits. This produces a beautiful pink with brown undertones, sometimes deep in color and sometimes very light.
Bee balm petals. I added this to a bundle dye, so I wasn’t able to identify much of a unique color contribution. Maybe pinkish?
Black beans. After heating and straining, I let the silk sit in this brew for three days and got an interesting muted blue/gray color along with a fermented funk.
Black walnut hulls. Wear gloves for this one, as black walnut hulls are very high in tannins, can stain, and are toxic and may cause skin irritation. The color produced on silk is a rich gray-brown.
Catalpa pods. I used these to create one of my favorite silk scarves (photo above) — bundle dyed into a gold and brown stripe pattern. In the late summer and fall, I can find these pods on the ground near a few of the boulevard trees in town.
Coffee. I call the dye color gold, but it’s somewhere between yellow, orange, brown and peach – truly beautiful and rich.
Coreopsis tinctoria. Also called dyer’s coreopsis, these flowers create shades of yellow, orange and brown.
Cosmos sulphureus. These fun orange blooms are the source of a fun orange dye!
Elderberries. By far the most versatile dye ingredient I’ve found — I’ve used elderberries for shades of purple, pink, blush, cream and even blue. It’s all about adding vinegar and/or baking soda to lower and raise the pH.
Eucalyptus leaves or roots. I’ve extracted soft orange shades from the leaves and much deeper orange-browns from the roots.
Japanese indigo leaves. The furthest I got with indigo dyeing was a salt rub using fresh leaves, which created a light blue-green. I didn’t get into the creation of an indigo vat, which can produce the deep blues that indigo is known for.
‘Karma Chocolate’ dahlias. While harvesting dahlias one day, I noticed that these stems and petals had some color in them when crushed (unusual for a dahlia). I tested them in a dye bath and found that they created the most gorgeous blush color on silk.
Lychee skins. These look and feel a lot like avocado skins, with bright pink on the insides. The silk I dyed ended up a muted mauvey-brown, which was unexpected but worked perfectly with a late summer wildflower-style wedding bouquet.
Marigolds. I’ve had the best results with a classic deep-orange marigold, which created a light yellow dye.
Murasaki roots. My plants are still fairly young and I’ve only done one test, which produced a fairly dull muddy color. The roots are supposed to produce a purple dye.
Onion skins, yellow or red. Using a dye bath I had very similar results from each color, an orangey gold that fades to a softer shade. With bundle dyeing, the colors are more distinct (gold and reddish purple).
Red beets. These create a light mauve in a dye bath, or a bold deep pink when the stems are used for bundle dyeing.
Rudbeckia. I’ve gotten shades of olive green and gray-blue when adding rusty nails and vinegar to the dye bath.
Safflower petals. This is a fun one – the dried petals produce a yellow dye initially. After you extract all that color, you can get shades of pink or red by adding baking soda or rubbing alcohol. I was able to get a bright pink on a piece of cotton cheesecloth.
Scabiosa atropurpurea ‘Black Knight.’ These dark burgundy flowers produce a warm medium purple tone. I’ve used them in dye baths, bundle dyeing and solar dyeing, all with great results.
Snapdragons. In midsummer I always have more snapdragons than I need, so one July I experimented with deep red ‘Madame Butterfly’ (mauve dye) and orange ‘Potomac’ (yellow-orange dye).
Turmeric. Yep, just the spice from a jar in the kitchen. I’m sure results would be even more amazing from fresh turmeric root, but the dry ground spice produced a gorgeous vivid yellow.
Give Dyeing a Try!
I knew very little about natural dyeing when I started, and I still feel like a novice, in a fun way. I like not knowing what the results will be, and I love the process of experimentation. I offer silk ribbons as an option to my wedding clients, and usually I don’t choose the ribbon until after I’ve made the bouquet – it’s one of my favorite parts of the process, playing with the color combinations.
There are hundreds of blogs, books, online courses and social media accounts devoted to natural dyeing, so you can start anywhere. If you like mixing art and science, and brewing up potions, I think you’ll enjoy it.

Elderberries are a favorite dye ingredient, producing shades of purple, pink, blush, cream and even blue (with baking soda or vinegar added to adjust the pH)